If you haven't been to Kris's stamping Maddiebug site in a while I encourage to check it out. Lots of cute ideas especially for you scrapbookers!
http://www.maddiebugdesigns.blogspot.com
Friday, July 30, 2010
Our New Color Chart
My sister purchased the new color chart and it was a great inspiration to our card making the other day! This handy tools will give you color combos that will make your cards look really impressive. The inspiration for this card came from the chart.
Cajun Craze, Espresso, Crumb Cake

Supplies: Big shot, embossing folder, top note die, ribbon, Inspired by Nature (Stamp Set, Pearl Stick Ons, Scallop Oval Punch
Cajun Craze, Espresso, Crumb Cake

Supplies: Big shot, embossing folder, top note die, ribbon, Inspired by Nature (Stamp Set, Pearl Stick Ons, Scallop Oval Punch
Cute Monkeys!

I like the monkeys in this stamp set, Fox and Friends
Supplies: Gala DSP, Espresso, Marina Mist, Daffodil, Cherry inks, Pear Pizzaz Cardstk, Tag Punch and a Brad, Stampin Dimensional, Emobssing folder and big shot, Espresso ribbon
I didn't use any fancy techniques, but just thought it was cute and easy. I cute the center monkey out and popped it with a Stampin Dimensional. Enjoy!
Tuesday, July 27, 2010
Smooched!
This card uses the new smooch spray!
Supplies: Cherry Cobbler Cardstock, More than Mustard Cardstock, Choc Chip Ink, Gold Glow Smooch, Craft Whisper White Ink, Chalks
A big thank you to my sister for this beautiful card!!
Directions: I like this technique because it makes the colors pop. The pitcher was stamped with whisper white craft ink and then chalked over to pick up the colors. Finished with a smooch to give it some shine and interest. The background papers were crumpled to add some beautiful texture!
Happy I Do Card
THis card uses the new Marina Mist color.

Supplies: Marina Mist cardstock and ribbon, Greenhouse Gala Paper, Silver paper, Rhinestones, circle punches
For the rings I punched the smaller circle 1 1/4 out of the silver cardstock and then ringed it with the larger 1 3/8 punch.

Supplies: Marina Mist cardstock and ribbon, Greenhouse Gala Paper, Silver paper, Rhinestones, circle punches
For the rings I punched the smaller circle 1 1/4 out of the silver cardstock and then ringed it with the larger 1 3/8 punch.
Monday, July 26, 2010
Cherry Cobbler Card
Cherry Cobbler is my new favorite color. Pair it with Not Quite Navy and one of the browns or Very Vanilla and you have a beautiful card!

Supplies: Embossing folder, Cherry Cobbler ink and cardstock, Not Quite Navy cardstock, sponge, scallop circle punch, flower punch, button and hemp twine
The secret to this card is the embossing folder. Run your cardstock through and sponge Cherry Cobbler onto the raised impressions to make them stand out. The not Quite Navy flower has texture by crumpling the punched flower and then ripping a top layer off. Now your punched flower has two pieces and just layer them on top of each other with an adhesive. Finish with a button center and add a scallop punched saying.
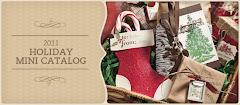
New Catalog!!
I love the new catalog! After finally getting a chance to play around with the new products I quickly developed some new favorites. Texture! I love the new embossing folders. They give a wonderful impression and are easy to use with the Big Shot. My other new favorites are the sticky jewels and pearls! Easy to use and at $4.95 a pack a great price, too!
My sister and I had a great time making some cards and I will post them here this month. Starting with this one! I am hoping to have an Open House in August so I will post details on the time and date soon!
I was so happy with how this card turned out!

What you will need: Embossing folder with your Big Shot, Crochet trim lace, Old Olive and Not Quite Navy inks and cardstock, Eyelet Border punch
Directions: Use an embossing folder for the great texture on the old olive background. Flowers are stamped with Not Quite Navy. One flower is cut out to give it a punch.
Friday, July 9, 2010
Fun Graduation Gifts!!
I made these personalized booklets for graduation gifts using the Big Shot!
Materials: Key Ring (I ordered a bunch from Oriental Trading), Ribbon and your favorite Stampin' Up! doubled sided paper, Big Shot and Die, Printer paper, adhesive, Sticky Cuts and glitter
I glued the patterned paper on the front and back of cardboard cut to feed into your Big Shot.
After I cut them out using the Big Shot and Die, I cut some printer paper as well. I could cut about 10 sheets at a time.
Next, I used the Crop-O-Dile to punch through everything and placed the key ring through the holes.
I decorated with sticky letters, chipboard, buttons and ribbon. You can use your favorite embellishments. We just came out with a whole bunch of fun ones in our new catalog!!
Subscribe to:
Posts (Atom)